


Guide to Kirlian Photography
If you're looking for a creative and magical way to take photos, this guide to Kirilian Photography is for you. Learn the secrets of how to reveal hidden auras!
Learn | Photography Guides | By Greg Cromie
If you’ve ever heard of Kirlian Photography, you might know there’s a long history and a lot of controversy around this fascinating topic.
Kirlian Photography is one of the more mysterious photographer genres surrounded by myth and a fair share of science.
Nevertheless, it’s commonly associated with photographs that claim to capture the aura of all living things – including people.
If I’ve already captured your attention, then this guide to Kirlian Photography is definitely for you!
As for what’s real and what’s purely a myth, you’ll have to read on to find out. Keep in mind that Kirlian Photography began a long time ago when science was still catching up to the mythical world.
There’s a lot of information out there to prove and dispel Kirlian Photography. Regardless of what you believe, it’s a photography genre worth discovering and forming your own opinion on its truth.
Join me as we explore Kirlian Photography and uncover its mysteries.
Keep in mind, I’m not a scientist, electrician, or a wizard so everything you do to achieve this genre is done at your own risk.
What is Kirlian Photography?
Kirlian Photography has a long and interesting history that kicked off in 1939.
Semyon and Valentina Kirlian (the practice was named after them) accidentally discovered the process while witnessing the use of a high voltage source and a contact print process. They were visiting a hospital in Krasnodar, Russia, where Semyon used his expertise in electrical engineering to fix lab equipment.
While there, he watched a presentation where a patient received treatment via a high-frequency electrical generator. The treatment required the patient to be placed on a photographic plate and subjected to strong electric fields.
A little like a simple X-ray, an image formed on the surface of the photographic plate.
What ‘sparked’ Semyon Kirlian‘s interest was the tiny flash of bright light that appeared between the patient’s skin and the machine’s electrodes.
The appearance of an apparent aura, or life force, fascinated Semyon Kirlian so much that he decided to conduct his own experiments and capture photographs of its effects. He was intent on photographing what he believed to be visible auras forming around the subject.
Being an electrician, he replicated the process at home and successfully captured images of his hand with an aural discharge around his hand.
It was this experiment and outcome that associated Kirlian Photography with the practice of photographing auras.
While this experiment took place in 1939, the results were not made public until 1958 – it was another example of ‘Psychic Discoveries Behind the Iron Curtain.’ Even still, the Kirlian phenomenon didn’t take hold in the curiosity of the masses until 1970.
The process employed by the Kirlian’s has been the subject of much debate over the decades since they went public. A
s we’ll discover, the question of its validity is still contested today by those who believe in aural phenomenons and those that take the side of science.
Is Kirlian Photography valid?
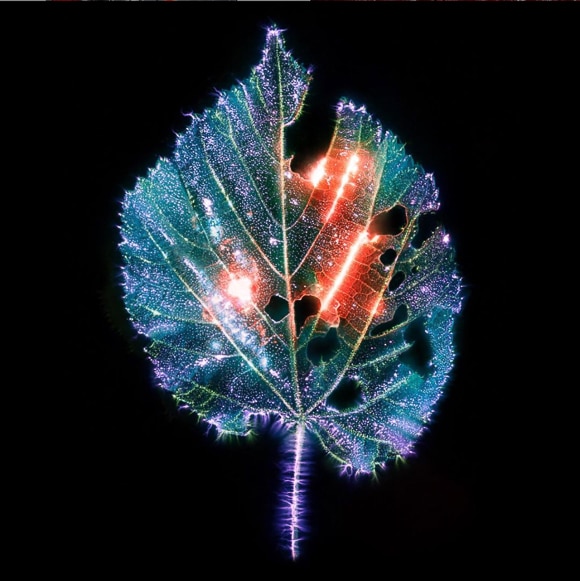
Image Credit: @yannphilippe
When ideas, concepts, and beliefs form, well before science exists to disprove them, people tend to cling to their version of the truth.
It applies to a wide range of theories and beliefs – many of which become conspiracy theories that infiltrate popular media and culture. However, once science catches up to these theories and disproves them, most people let go of the mythical and accept the expert’s explanations.
How Much Do You REALLY Know About Photography?! 🤔
Test your photography knowledge with this quick quiz!
See how much you really know about photography...

Kirlian Photography took a slightly different path to enlightenment – one that its founder spurred on.
Let’s take a closer look at the myth and the science behind Kirlian Photography and auras.
How To Take A Kirlian Photo
Before we get into fact and myth, let’s take a look at the basics involved in Kirlian Photography.
It’s important to know that the original Kirlian process didn’t involve an actual camera or lens – standard or specialized. Keep in mind that the first experiments occurred in the first half of the 20th century – well before digital cameras.
Back then, taking a Kirlian photograph required an old-school contact print process of placing a sheet of photographic paper on a metal plate. Then, the subject of the photo was placed on top of the paper.
With electrodes attached to the metal plate, a high-voltage frequency passed through the plate. The process created what is known as an electrical corona discharge that occurs between the subject and the metal plate.
As a result, it’s sometimes referred to as corona discharge photography.
Once the photographic paper was developed, the resulting image showed the subject in the middle with a glowing silhouette or aura around its edges.
People That See Auras
Believers claim that auras are the invisible spiritual energy field that surrounds all living things. However, most of us don’t claim to be able to see another person’s aura.
Many people believe they have a spiritual vision to see and even read another person’s aura. Auras are visible to these people in many different colors and intensities that allow them to ‘read’ a person’s emotional and spiritual state.
It’s essential to understand that believers say that auras are not always visible. However, aura readers claim that an aura exists as an energy field around another living being.
There’s a lot of scientific research into the realities of auras, with the most common view being that people who see auras have Synesthesia.
Synesthesia is an uncommon condition where a person experiences crossed wires in their senses.
For example, some of the more common experiences include Synesthetes feeling sounds, tasting shapes, and hearing colors.
Others experience color as a sensation in certain circumstances and may associate warm colors with friendly people and dark shade with unfriendly people.
One explanation for aura vision is that these people have undiagnosed Synesthesia. When they read a person’s aura, their Synesthesia is confusing their senses with color, and they see an aura around another person or living being.
The Kirlian Photography Myth
What’s unique about the myth behind Kirlian Photography is that it began as a theory discovered by the Kirlian’s.
They investigated the phenomenon and conducted their experiments at home. From this research, they propagated the original mythical explanation about the phenomenon.
Their research concluded that the photographs depicting auras around living beings represented a projected life force.
New Age spiritualists adopted the Kirlian myth that believed auras surrounds every living being and reflects a person’s spiritual, physical, and emotional condition.
The Kirlian’s took this a step further by claiming that their photographs accurately read and displayed the same spiritual, emotional, and physical states. They further believed that these photographs and aura readings could be employed medically to diagnose medical conditions.
Unless you’ve visited a New Age doctor lately, chances are you’ve never been shown a Kirlian photograph by a doctor to prove you have an iron deficiency.
New Age practitioners and followers have adopted Kirlian and Aura photography to read, diagnose and even treat spiritual conditions. In fact, a range of spiritual and mystical healing approaches often fall under the category of Kirlian.
A lot of New Age and mythical phenomenons have come and gone over the years. But there’s still a strong following in the realities and value of auras, aura photography, and, of course, Kirlian Photography.
The Science of Kirlian Photography
What’s so interesting about Kirlian Photography is that it started as a scientific exploration. It wasn’t a centuries-old belief or myth that evolved over considerable time, only for science to eventually dispel it.
Kirlian Photography began with a very scientific approach during the modern age.
The scientific community investigated Kirlian Photography and, in many cases, disproved what the Kirlian’s and their believers claimed to be true.
Science doesn’t agree with the Kirlian myth and that there’s a visible lifeforce, or a Kirlian photography aura, surrounding every living being. Scientists usually discredit the belief that people can see, read and treat medical conditions through a person’s aura.
While we’ll cover how to capture Kirlian Photographs later, it’s essential to understand the basics:
Kirlian photographs don’t require a special aura camera and photographic lens. Instead, a living object sits on a piece of photographic paper placed upon a metal plate.
A high-voltage electrical frequency passes through the plate to cause the initial exposure of the paper.
During this process, the air surrounding the subject becomes ionized, and any water in or on the living subject glows due to resulting corona discharge.
As all living organizing contain some level of liquid or moisture, it stands to scientific reason that this method, applied to any living subject, will produce the corona discharge or aura.
The more moisture present, the brighter and more evident the aura. Other factors impact the appearance of the aura in a Kirlian Photograph, such as the room temperature, humidity, the level of voltage, and the size of the subject.
Despite the scientific evidence, trials, and publications, many choose to believe that a Kirlian Photograph is an authentic aura and a display of spiritual vitality.
How to Take Kirlian Photographs

Image Credit: @Kirlianphotographieart
While the founding of Kirlian Photography didn’t require the use of a dedicated Kirlian photography camera and lens, things are a little easier these days.
It’s referred to as Kirlian Photography due to the use of photographic paper to capture the corona discharge at the moment of exposure. A color photographic film process developed the photographic paper to reveal the image.
Instead of using photographic film, you can now use a digital camera to replicate the experiment and capture a Kirlian Photograph at home. Next, we’ll teach you how to make a Kirlian Photography machine for the spiritually or scientifically curious out there.
It’s a lot of fun to experiment with different objects, alter exposure times and review your results.
Another unique approach is to capture a short video recording in high resolution with a video camera.
A Word of Warning
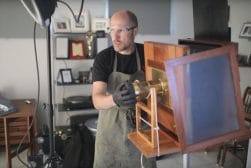
A Kirlian device setup is not a store-bought piece of equipment. Instead, it requires the purchase of separate components that you put together.
It takes a fair bit of hands-on experience with electronics.
One of the critical elements of the device is a high voltage spark coil. Therefore, a homemade device using this equipment must be treated with absolute caution and not taken lightly.
Before you capture your own Kirlian photos, please ensure that you operate in a safe working environment away from children and pets. You should also consult an experienced electrician if you have any doubts.
What do you need for Kirlian Photography?
- A digital SLR or Mirrorless camera that can take long exposures
- Alternatively, use a video camera
- Tripod
- A lens with a wide maximum aperture
- Plasma discharge plate
- High voltage insulators such as rubber matting
- Electric conductive solution (saltwater)
- High voltage spark coil
- Power pulse modulator
- Transparent electrodes
- A range of subjects
- Insulated wire
- Transparent tape
How do you make a Kirlian Photography Machine?
With the above shopping list ticked off, it’s time to construct your Kirlian Photography Machine or Kirlian Camera and take your Kirlian images of inanimate objects.
Fortunately, you don’t have to take a course on contact print photography nor go out and buy aura cameras – they don’t exist!
The following step-by-step process is a general guide, and we recommend you undertake further research on the steps before proceeding. Finally, work with non-living objects as your subject matter to achieve the final image.
Follow this step-by-step process and ensure you take all caution to ensure your safety.
1. Setup The Workspace
Before you start assembling your Kirlian Photography Machine, you need to choose a suitable workspace.
Ideally, use a workbench, desk, or kitchen counter space that’s free of clutter. You’ll also need to set up a tripod close to the workspace with the camera and lens securely attached.
Ensure you have enough room to move around the work surface and the camera tripod without accidentally bumping into either.
As you’ll need a dark environment to capture the corona discharge, work in a room where you can close the blinds and drapes to darken the space. Normal light will make it tricky to see the corona effect on the discharge plate.
2. Prepare The Photo Plate
The plasma plate, or discharge plate, needs to be big enough to support your subjects while still allowing enough room around them for the corona discharge to be effective. Ideally, the plate should be in the shape of a shallow dish.
In more advanced versions of photographic plates, a glass plate takes the place of the metal discharge plate. The glass plate can feature different layers with a sealed layer housing conductive liquid and a wireframe.
The high voltage corona effect is more visible with a glass plate and transparent electrode connecting the wireframe to the power source.
3. Create The Electrically Conductive Solution
The next step is to prepare the conductive solution with a salt and tap water mixture – allow the salt time to dilute. Finally, fill the plate with the saltwater solution to ensure the bottom of the plate is completely covered.
Keep in mind that once you place a subject on the plasma plate, the water level will rise.
4. Choose Your Kirlian Photograph Subjects
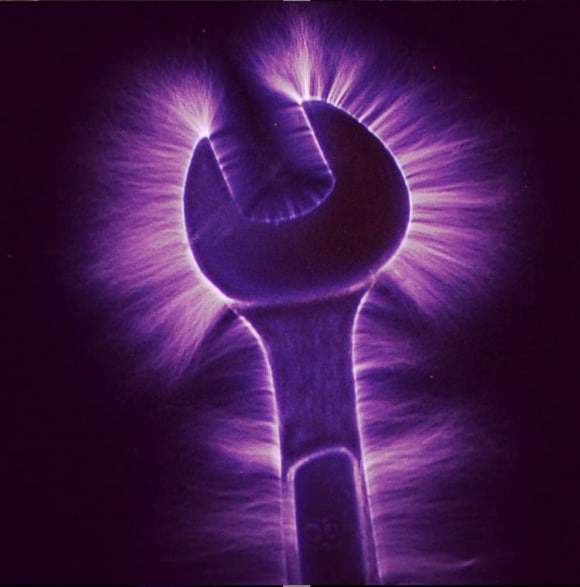
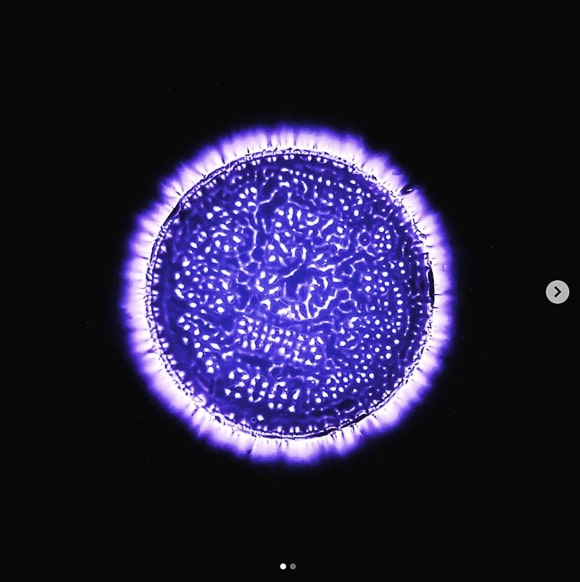
Make a selection of small objects to photograph and test out your Kirlian photography technique. Select an assortment of inanimate objects such as cutlery, coins, nuts, and bolts.
As a corona discharge works best with high-moisture content, you’ll need a selection of (recently) living subjects such as leaves, tree nuts, flowers, and even slices of fruit or vegetables.
After all, a Kirlian photograph demonstrates the corona discharge for the science-minded and an aura for those in favor of the mythical aspect.
Compare the difference between photographing a piece of watermelon with high liquid content and a slice of apple. Experiment with a range of objects and consider placing them side by side – imaging a metal coin next to a round slice of carrot.
5. Mount Your Plate On a Non-Conductive Surface
To avoid the plasma plate leaving a mark on your work surface, it’s best to mount it on a non-conductive surface.
When the high voltage electrical energy passes through the plate, it may burn the work surface. The other risk is causing electrocution as the work surface could conduct electricity.
It’s an essential step in the process for obvious reasons. First, mount the plasma plate on top of a plastic or rubber surface and ensure that it’s stable and won’t topple during the process.
Some options include a plastic storage container, plastic cups, or a rubber cutting mat.
6. Ground The Connection
Run the length of insulated copper wire from the plate to a grounding point – connect the wire to the edge of the plate or subject with a transparent electrode. It’s an important step to ensure that experiment is effective and safe.
7. Connect The High-Voltage Coil To The Plate
With the power off, connect the terminals of the high-voltage coil to the plate using insulated wires suitable for the voltage. Next, connect the wires to the plate using electrodes secured with suitable electrical tape.
If you can’t keep the electrodes out of the picture, use clear tape to secure them for minimum visual impact.
8. Power Up
With everything in place and your connections double-checked, it’s time to power up your Kirlian Photography Machine. Turn the High-Voltage Coil on and set the power accordingly.
You can vary the power range throughout the experimentation process to alter the corona discharge and determine the best outcomes.
With the high-voltage and high-frequency electricity running without issue, it’s time to dial in your camera settings and take photos.
9. Best Camera Settings For Kirlian Photography
Provided you’ve created a safe and effective Kirlian Photography device; it will run without issue for as long as you run power to it. As a result, long exposures capture the best corona effect photos. Let’s look at the camera settings for visually stunning Kirlian photos.
The aperture setting on a lens controls the depth of field and exposure in a photograph.
As you’ll be mainly photographing flat objects, depth of field is not a consideration. However, given you’re taking photos in a dark room, maximizing the incoming light is essential.
Set the aperture to its widest – represented by the smallest number on the lens aperture dial. An aperture around f/2.8 or wider (smaller number) is best.
The shutter speed controls how long the incoming light exposes the digital image sensor inside the camera.
For Kirlian Photography, a slow shutter speed is necessary for two reasons.
The first is that it allows enough time for the sensor to detect the details in a dark room. The second is that it gives time for the Kirlian effect to occur long enough for you to capture the corona discharge in detail.
I recommend starting with a long shutter speed of 10-seconds – you’ll need to use the T (Time) or B (Bulb) mode on your shutter speed dial for this duration of exposure. Once you’ve experimented with 10-second exposures, dial-in longer exposures of 20 and 30-seconds and review the results.
The ISO setting controls how the image sensor handles the incoming light sensitivity. An ISO of around 800-1600 is suitable for these shooting conditions.
Too high an ISO and the image will degrade due to image noise – this is where the camera struggles to read the scene and replaces pixels with random colors.
Given that you’ll have the lights turned off but will shoot with a slow shutter speed, you don’t need a high ISO – around 800-1600 will do fine.
10. Capture Your First Kirlian Photograph
With the camera settings correctly dialled in, mount the camera to the tripod and position it so that it faces down onto your Kirlian Photography device.
Ensure that the subjects on the discharge plate are in sharp focus – you achieve this via manual or autofocus.
Given that you’re using a long exposure time, any camera or subject movement will result in motion blur. In essence, your photos will be unusable as everything will be out of focus.
While the tripod provides stability during the long exposure, even pressing the shutter release button on the camera can be enough to cause blur.
To combat this, use the camera’s self-timer and set it for 2-seconds. That way, once you press the shutter release button, you have 2-seconds to step back from the camera before it takes the shot.
The other option is to use a wireless trigger release or a smartphone app that fires the shutter release remotely.
11. Review The Kirlian Effect
Once you’ve taken several photos with evidence of electrical corona discharge, it’s time to take your memory card out of the camera and review the photos.
You can use editing software on a desktop computer to first review the images for sharpness and clarity.
It would be pretty evident if you nailed the Kirlian process due to the visible light surrounding your subjects. The Kirlian aura will radiate outwards from the objects in the photo and appear as a glowing outline or silhouette.
With editing software such as Adobe Lightroom, you can edit the images to really make them pop.
Boost the contrast a little and drop the blacks while elevating the highlights to make the Kirlian effect stand out in the resulting images.
Download a Kirlian Photography App

There are several smartphone apps available for iOS and Android in their respective stores.
To be honest, they’re nothing more than tools that add an aura-like filter to your existing photos or as you take new ones.
A great app that’s worth downloading and playing with is the Kirlian Device Mobile app for Android. The app is part of a creative project to understand and explore spatial qualities of wireless exchange protocols like WiFi.
In simple terms, the Kirlian Device Mobile app reveals the existing WiFi energy fields through long exposure. The app captures the energy fields like an aura and allows you to visualize how your WiFi Network operates in a given space.
It’s a simple tool that applies a scientific and tech-based approach to detecting energy and represents it as an aura.
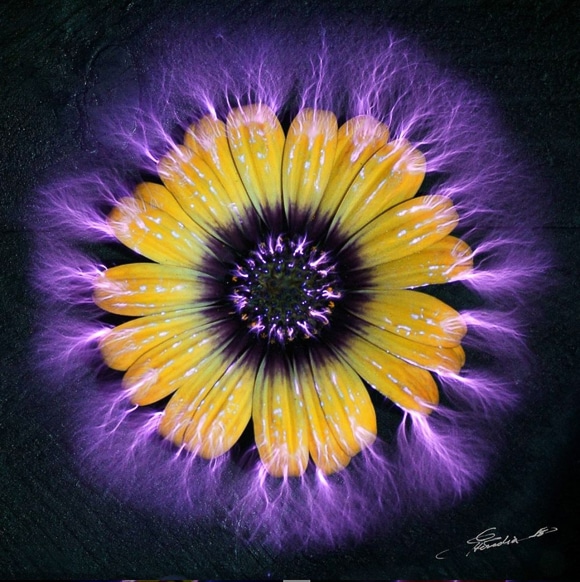
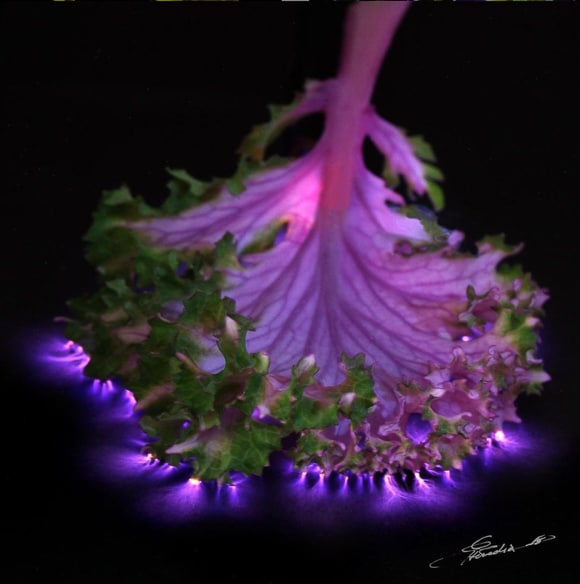
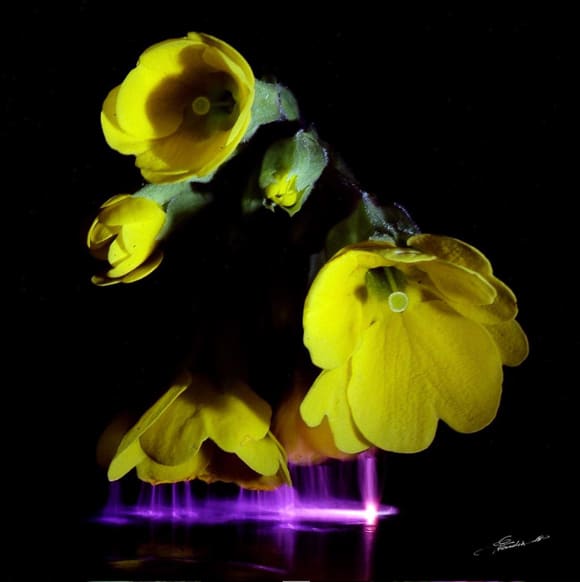
9 Examples of Kirlian Photography Images
If you’re keen to see examples of Kirlian Photography Images for yourself, the best place to check them out is Instagram. We’ve collated several examples here that demonstrate the use of the Kirlian effect in photography.
If you conduct an Instagram search for the#kirlianphotography tag, you’ll see great examples of Kirlian Photography. You’ll also come across a lot of images taken with aura filters too.
Credit: @Kirlianphotographieart
Credit: @Kirlianphotographieart
Credit: @Kirlianphotographieart
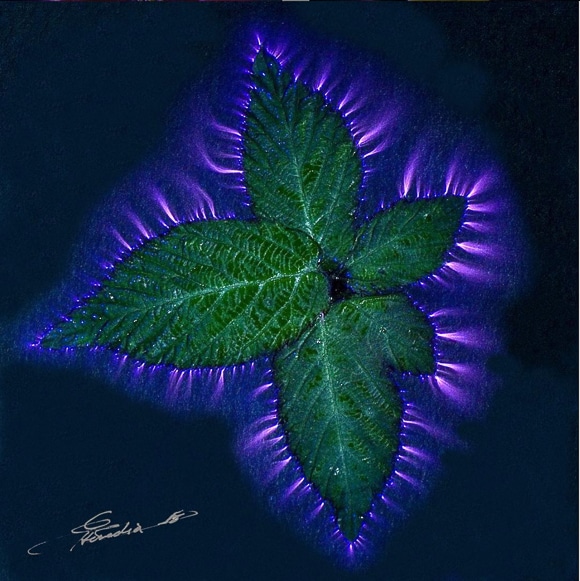
Image Credit: @Kirlianphotographieart

Credit: @Kirlianphotographieart

Credit: @rienpetie
Credit: @rienpetie

Credit: @extrahightension
Credit: @extrahightension
Final Words
Semyon Kirlian believed he had made one of the greatest spiritual observations by discovering how to capture the auras of the human body.
It was one of many discoveries behind the iron curtain buried for decades before the world became aware of it.
What’s most impressive about his discovery is that with photographic film and a high voltage source of power, he produced images of a natural reaction.
A humble electrical engineer discovered a supernatural event – only to later be discredited as nothing more than corona discharges caught on photographic emulsion paper.
It makes you wonder what other unimaginable discoveries behind the iron curtain exist and are kept as state secrets.
With the right gear, knowledge, and plenty of precautions, you can create Kirlian Photography with a standard camera and a little bit of tech know-how.
What are your thoughts on Kirlian Photography and its controversial history? Do the images produced using corona discharges powered via a high-frequency electrical generator appeal to you?
Share your thoughts, experiences, and questions below.

Check out these 8 essential tools to help you succeed as a professional photographer.
Includes limited-time discounts.
 4 Best Digital Photo Frames in 2024 to Display Your Pictures
 Guide to Wet Plate Photography
 25 Alternative Photography Processes To Try
 What is a Plate Shot? (+ How are Background Plates Used)
 CineStill Film: Everything Your Need to Know in 2024
 123 Different Styles & Types of Photography To Try in 2024

I’m a Melbourne-based street photographer and blogger. I love to travel to Japan to photograph and document its dynamic people and culture.


