
Related Manuals for Shimano FD-RX810


Summary of Contents for Shimano FD-RX810
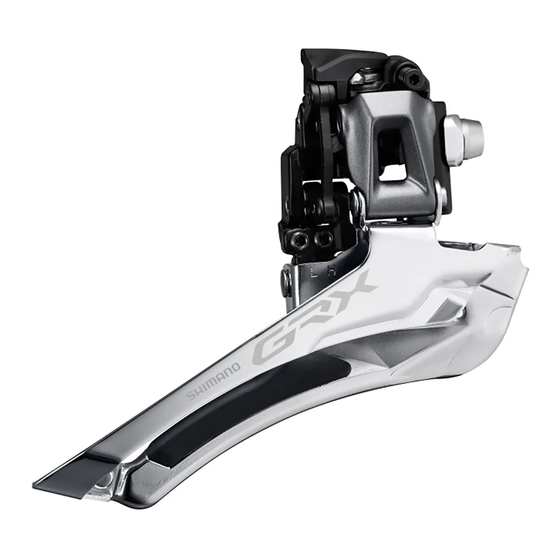
- Page 1 DM-GAFD001-00 (English) Dealer's Manual ROAD Trekking City Touring/ URBAN SPORT E-BIKE Comfort Bike FRONT DERAILLEUR FD-RX810 FD-RX400...
-
Page 2: Table Of Contents
CONTENTS CONTENTS .................2 IMPORTANT NOTICE ..............3 TO ENSURE SAFETY ..............4 LIST OF TOOLS TO BE USED ............6 INSTALLATION/REMOVAL ............7 Installing the front derailleur ..............7 • Installing the backup plate ...................... 7 • Installing the front derailleur ....................9 • If using a band adapter (SM-AD91) to install the front derailleur ........12 ADJUSTMENT ................15 Installing the inner cable and adjusting gear shifting ...... -
Page 3: Important Notice
• All owner's manuals and dealer's manuals can be viewed on-line our website (http://si. shimano.com). • For consumers who do not have easy access to the internet, please contact a SHIMANO distributor or any of the SHIMANO offices to obtain a hardcopy of the User's Manual. -
Page 4: To Ensure Safety
• Be sure to follow the instructions provided in the owner's manual when installing the product. It is recommended to use SHIMANO genuine parts only. If parts such as bolts and nuts become loose or damaged, the bicycle may suddenly fall over, which may cause serious injury. - Page 5 TO ENSURE SAFETY • Products are not guaranteed against natural wear and deterioration from normal use and aging. • For maximum performance we highly recommend SHIMANO lubricants and maintenance products. For Installation to the Bicycle, and Maintenance: • Use an OT-SP sealed cable and cable guide for smooth operation.
-
Page 6: List Of Tools To Be Used
LIST OF TOOLS TO BE USED LIST OF TOOLS TO BE USED The following tools are needed for installation, adjustment, and maintenance purposes. Tool 2 mm hexagon wrench 4 mm hexagon wrench 5 mm hexagon wrench Nippers... -
Page 7: Installation/Removal
INSTALLATION/REMOVAL Installing the front derailleur INSTALLATION/REMOVAL NOTICE • With a carbon frame, even the recommended tightening torque may be too tight and cause damage to the frame, or too loose and not sufficiently attached to the frame. For the appropriate torque value, consult with the manufacturer of the completed bicycle or the manufacturer of the frame. - Page 8 INSTALLATION/REMOVAL Installing the front derailleur Install the backup plate. Avoid positioning the tape that attaches the backup plate to the seat tube in the location where the support bolt directly touches the frame. Backup plate Tape Backup plate Support bolt...
-
Page 9: Installing The Front Derailleur
INSTALLATION/REMOVAL Installing the front derailleur Installing the front derailleur Adjust the installation height and temporarily attach the front derailleur to the frame. Adjust the installation height so that the distance from the tips of the teeth of the largest chainring is 1 - 3 mm. 1 - 3 mm Chain guide outer plate Largest chainring... - Page 10 INSTALLATION/REMOVAL Installing the front derailleur Adjust the position of the chain guide. Use the low adjustment bolt to align the front end of the chain guide outer plate with the surface of the largest chainring. At this point, adjust the chain guide so that its rear end is 0.5 - 1.0 mm inside. Low adjustment bolt Front end of chain guide outer plate...
- Page 11 INSTALLATION/REMOVAL Installing the front derailleur Readjust the chain guide position. (1) Adjust the support bolt so that the flat portion of the chain guide outer plate is aligned with the surface of the largest chainring. At that time, make sure that the support bolt is in contact with the backup plate.
-
Page 12: If Using A Band Adapter (Sm-Ad91) To Install The Front Derailleur
INSTALLATION/REMOVAL Installing the front derailleur If using a band adapter (SM-AD91) to install the front derailleur Mount the band adapter (SM-AD91) to the front derailleur. Touch the support bolt to the band adapter. Support bolt Band adapter Fixing bolt 5 - 7 N·m Adjust the installation height and temporarily attach the front derailleur to the frame. - Page 13 INSTALLATION/REMOVAL Installing the front derailleur Adjust the position of the chain guide. (1) Use the low adjustment bolt to align the flat portion of the chain guide outer plate with the surface of the largest chainring. (2) Check the adjustment position by pressing a hexagon wrench or other tool to the flat portion of the largest chainring.
- Page 14 INSTALLATION/REMOVAL Installing the front derailleur Secure the clamp bolt. Clamp bolt 5 - 7 N·m...
-
Page 15: Adjustment
ADJUSTMENT Installing the inner cable and adjusting gear shifting ADJUSTMENT Installing the inner cable and adjusting gear shifting Securing the cable Operate the release lever on the dual control lever and set it to the initial position (on the smallest chainring side). Remove the link cover. - Page 16 ADJUSTMENT Installing the inner cable and adjusting gear shifting Pass the inner cable through the front derailleur. (1) Use the low adjustment bolt to align the flat portion of the chain guide outer plate with the surface of the largest chainring. (2) Confirm that the adjustment barrel protrusion is in contact with the input link.
- Page 17 ADJUSTMENT Installing the inner cable and adjusting gear shifting TECH TIPS • Fixing the cable with the chain guide outer Chain guide plate and the surface of the largest chainring aligned, allows you to decrease the amount of cable tension adjustment 1 - 3 mm when adjusting gear shifting.
- Page 18 ADJUSTMENT Installing the inner cable and adjusting gear shifting Temporarily fix the inner cable and remove the initial extension from the cable. TECH TIPS • For a full outer model, operate the lever normally, move the front derailleur several times, and then remove the initial extension. After removing the initial extension, secure the cable in place and then adjust.
-
Page 19: Adjusting Cable Tension
ADJUSTMENT Installing the inner cable and adjusting gear shifting Secure the inner cable. Secure while pulling the cable. Cable fixing bolt 6 - 7 N·m Adjusting cable tension Align with the gear where the lever is released from the top position to the T-trim position. -
Page 20: Top Adjustment
ADJUSTMENT Installing the inner cable and adjusting gear shifting Adjust the cable tension. Adjust the cable tension with the cable adjustment barrel or cable adjuster on the frame, so that the indicator lines of the bracket and input link are aligned. If the cable was given too much tension and the bolt was loosened, be sure to release it first in the lowest position. - Page 21 ADJUSTMENT Installing the inner cable and adjusting gear shifting Align the chain with the largest sprocket. Largest chainring Largest sprocket Adjust the top position of the chain guide. Set so that the clearance between the chain guide inner plate and the chain is 0 - 0.5 mm. Top adjustment bolt Chain 0 - 0.5 mm...
-
Page 22: Low Adjustment
ADJUSTMENT Installing the inner cable and adjusting gear shifting Low adjustment Align with the gear where the lever is released from the low side to the L-trim position. Smallest chainring L-trim T-trim Low adjustment point Largest sprocket Adjust the lowest position of the chain guide. Adjust so that the clearance between the skid plate of the chain guide and the chain is 0 - 0.5 mm. -
Page 23: Handling The Cable End
ADJUSTMENT Installing the inner cable and adjusting gear shifting Handling the cable end Run the end of any excessive cable through the hole in the link cover. Install the link cover. Link cover Run the cable through as shown in the figure. Next, cut the cable and install an end cap. -
Page 24: Checking Gear Shifting And Fine Tuning
ADJUSTMENT Installing the inner cable and adjusting gear shifting NOTICE • Check that the cable is not pinched in between the outer link and input link when the lever is released in the L-trim position. Checking gear shifting and fine tuning After the cable is installed and adjusted, check the gear-shift by operating the shifting lever. -
Page 25: Maintenance
MAINTENANCE Replacing the skid plate MAINTENANCE Replacing the skid plate Removing the skid plate Remove the skid plate. Make a slit in the skid plate at the position illustrated using nippers, and then remove the skid plate. NOTICE • The skid plate on the outer plate side cannot be replaced. Installing the skid plate Install a new skid plate. - Page 26 Please note: specifications are subject to change for improvement without notice. (English) © Mar. 2019 by SHIMANO INC. ITP...